Heart Case (#1351)
Product(s): Heart Case (#1351)
- Cover
- Positionable Arm
- Install Mitral Valve Prolapse Trainer
- Install Mitral with Atria
- Install Aortic Root
- Install Anastomosis Stand
- Install Small Vessel
- Replace Small Vessel Barbs
- Exchange Barbs to Mount Aorta
- Install 4″ Aorta
- Install Heart Cradle and Heart
- Install Beating Heart
- Animating the Beating Heart
- Replace Native Coronary Arteries on CABG Heart
- Heart Maintenance
IMPORTANT: The set-up, operation and care of this model are explained herein. To ensure successful use of this model, review and understand instructions thoroughly before use and follow them as described. As many of our materials, particularly those that simulate in vivo tissue, are fragile, they may be sensitive to environmental or handling conditions (i.e. extremes of temperature and humidity) that will affect their ultimate shelf life. To ensure the maximum shelf life possible, please keep all simulated tissue in a temperature-controlled environment and free from exposure to conditions that might cause them to fail. To avoid distorting the tissue surfaces always repack trainer parts in their original packaging without compression by contact with other objects such as devices and instruments. To ensure the longest useful life of the trainer, please handle with care and protect it when shipping or traveling.
Cover
Pull up on all four quick-release fasteners to disengage before lifting off the cover.
Align fasteners with holes in base and press down to engage when replacing cover.
Positionable Arm
Loosen the arm by turning the center knob counter-clockwise. Position the arm in your preferred orientation and turn knob clockwise to lock.
Install Mitral Valve Prolapse Trainer
Pull on the quick-release fasteners, on underside of mounting plate, to disengage. Place Mitral Valve Prolapse Trainer on mounting plate, align fasteners with holes, and push in to lock.
Install Mitral with Atria
Pull on the quick-release fasteners to disengage. Place Mitral with Atria (#1074) on mounting plate, align fasteners with holes, and push in to lock.
Install Aortic Root
Center the Aortic Root in the ring from the underside, pull up on the three fasteners on the ring, align with the holes in the triangular plate and push down to lock.
Install Anastomosis Stand
Align holes on bottom of stand with two of the quick-release fasteners on the mounting plate. Press in fasteners to secure.
Install Small Vessel
Slide the vessel onto one barbed fitting, then the other.
Replace Small Vessel Barbs
To exchange 3mm or 4mm barbed fittings, turn counter-clockwise to remove and turn clockwise to attach.
Exchange Barbs to Mount Aorta
Loosen red knobs, slide brackets off the stand. Turn brackets around so posts face inward and slide onto stand. Tighten red knobs and remove luer caps from posts.
Install 4″ Aorta
Slide hose clamps onto Aorta segment. Slide Aorta onto posts and fasten clamps to secure.
Install Heart Cradle and Heart
Install the heart cradle on mounting plate. Slide the IVC through hole in cradle and gently secure in place with hose clamp.
Install Beating Heart
Install heart cradle on mounting plate and feed the heart’s airlines and IVC through the opening. Gently install hose clamp on IVC to secure.
Animating the Beating Heart
Overview
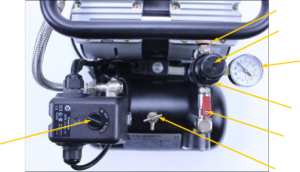
The Beating Heart Controller is the system that animates the Beating Heart. It has 4 pre-programmed heart rates: 60, 90, 120, or 160 beats per minute. The Sync function allows the heart rate to be triggered by an alternate source.
Beating Heart Controller requires a 15 VDC power supply (included) and a regulated source of compressed air.
IMPORTANT
Always ensure Heart Rate control knob is set to “Off” before connecting Beating Heart Controller to air supply (wall air or compressor). Connection to an unregulated air supply exceeding 70psi may cause irreparable damage to the Beating Heart.
Set Up Beating Heart Controller – Control Box
Plug into Control Box : • Signal Line, • 15 VDC Power Supply Adaptor, • Sync Cable (if needed).
Set Up Beating Heart Controller – Solenoid
Plug into Solenoid: • Air Lines, • Signal Line, • Air Supply Line.
Connect Heart and Controller Airlines
Connect the Controller’s • Air Lines to the Beating Heart’s • Air Lines, turning luer fittings clockwise to secure.
Connect Power Supply
Ensure Heart Rate control knob is set to “Off” and plug the 15 VDC Power Supply Adaptor • into an AC power source (110-240v), using appropriate plug adaptor as necessary.
Set Up Air Supply

IMPORTANT Ensure Beating Heart Controller is OFF before connecting to air supply. Never connect Controller to an unregulated air supply, doing so may cause irreparable damage to the Beating Heart.
Set air supply to: 70 psi for Adult Hearts or 60 psi for Pediatric Hearts.


Test Beating Heart and Controller
Power on the Beating Heart Controller by turning ‘Heart Rate’ knob to desired Heart Rate/BPM. The Heart should begin beating.
If you encounter problems check to see that sufficient air pressure is being delivered, no air lines are pinched, and that all connections are secured.
When not in use, shut down Compressor and turn off Beating Heart Controller to minimize wear.
IMPORTANT Always turn off Beating Heart Controller before connecting or disconnecting the power supply or other lines.
Replace Native Coronary Arteries on CABG Heart
Insert the wire loop of the Threader Tool into a feeder hole until the loop appears in the Coronary Slot. Keep the threading tool parallel to the surface of the heart when passing it through the channel.
Heart Maintenance
Renew the sheen on the surface of heart model by applying a light coat of Lubricant 57. Squeeze approximately 10-15 drops of the lubricant into the palm of your hand. Rub hands together and gently massage the heart to distribute lubrication. Pat heart with a paper towel to remove excess lubricant as needed.
NOTE: Always wear surgical gloves when handling lubricant 57 and avoid prolonged or repeated contact with skin.
Questions?
Contact The Chamberlain Group
Email: info@thecgroup.com
Toll free: 800.562.7569
International: +1.413.528.7744